Being prepared for emergencies is crucial, whether you’re an avid outdoorsman or just want peace of mind in case of unexpected situations. Building your own DIY survival gear kit ensures you have the essentials and allows you to customize it to your specific needs. This comprehensive guide will walk you through the key components, assembly instructions, maintenance tips, and even some advanced projects to take your preparedness to the next level.

Table of Contents
Essential Components of a DIY Survival Gear Kit
Water and hydration
- Water is your top priority. Include methods for purifying water in the wild, such as water purification tablets, filters, or materials to build your own filter.
- Pack collapsible water containers to collect and store water.
Food and cooking
- Stock up on non-perishable, high-energy foods like energy bars, dried fruits, and nuts.
- Include compact cooking equipment like a small pot, utensils, and a lightweight stove.
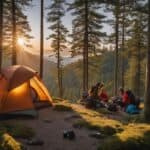
Shelter and warmth
- Emergency blankets and ponchos provide insulation and protection from the elements.
- Pack paracord and a tarp for constructing makeshift shelters.
First aid and hygiene
- A basic first aid kit with bandages, antiseptic, and pain relievers is essential.
- Don’t forget personal hygiene items like hand sanitizer, toothbrush, and toilet paper.
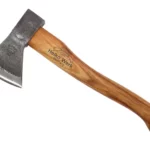
Tools and multi-purpose items
- A multi-tool or Swiss Army knife offers versatility for various tasks.
- Include a flashlight with extra batteries for navigation and signaling.
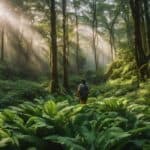
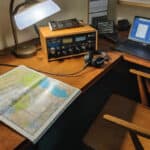
Navigation and communication
- A compass and maps of your area aid in navigation.
- An emergency whistle and signaling mirror can help attract attention if you need rescue.
Step-by-Step Instructions for Assembling Your Kit
- Choose a durable, water-resistant container like a backpack or dry bag.
- Organize your gear into categories using resealable bags or pouches.
- Pack items strategically, with the most essential and frequently used items easily accessible.
- Customize your kit based on personal needs, anticipated environment, and length of potential emergencies.
Maintenance and Upkeep Tips
- Regularly check expiration dates on perishable items like food, water purification tablets, and first aid supplies.
- Replace any used or damaged gear promptly.
- Re-evaluate and update your kit as your needs or skills change.
Advanced Survival Gear Projects
For those looking to take their preparedness further, consider these DIY projects:
- Construct your own water filtration system using natural materials like sand, charcoal, and gravel.
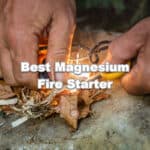
- Make homemade fire starters using dryer lint, candle wax, and egg cartons.
- Learn to improvise fishing and trapping equipment using paracord, hooks, and snare wire.
Putting Your Survival Gear Kit to the Test
- Practice scenarios to familiarize yourself with using your gear effectively. Set up shelters, start fires, and navigate with your compass.
- Identify areas where you can improve your kit or your skills.
- Adapt your kit based on your hands-on experience and learnings.
Building your own DIY survival gear kit is a rewarding way to enhance your emergency preparedness. Following this guide and customizing it to your needs gives you the confidence to face unexpected situations. Remember to maintain your kit, practice your skills, and always be open to improving.
We’d love to hear about your own DIY survival gear tips and experiences! Share them in the comments below or connect with us on social media using effective distress signals to get our attention 🙂 Stay safe out there!

Leave a Reply