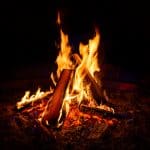
Fire is a crucial element for survival, providing warmth, cooking, and signaling capabilities. In challenging conditions, such as cold weather or wet environments, starting a fire can be difficult. This article will explore advanced fire-starting techniques to help you master the art of fire in survival situations.
Table of Contents
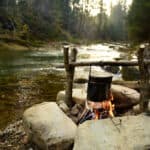
Considerations for Fire Location
Moisture avoidance
Choose a location away from moisture to increase the likelihood of successful fire-starting. Damp ground or wet foliage can make it harder to ignite and sustain a fire, so opt for dry, elevated spots when possible.
Wind protection
Select a spot that is sheltered from the wind to prevent the fire from being extinguished. Strong winds can quickly blow out a fledgling fire, so look for natural windbreaks like boulders, trees, or hillsides to provide protection.
Proximity to noncombustible surfaces
Position the fire near a large rock wall or another noncombustible surface or structure to reflect heat and provide a stable base. This can help maximize the warmth and light generated by your fire while minimizing the risk of it spreading uncontrollably.
Flint and Steel
Overview of the technique
Flint and steel is one of the oldest and most reliable methods of starting a fire. It consists of three main components: flint, steel, and tinder. By striking the steel against the flint, you create sparks that ignite the tinder, which can then be used to light kindling and build a larger fire.
Advantages
Flint and steel is a tried-and-true method that has been used for centuries. It is not dependent on weather conditions or the availability of specific materials, making it a versatile and reliable choice for survival situations.
Tips for success
Use high-quality flint and steel to increase the chances of generating sparks. Prepare a tinder bundle that will easily catch the sparks and ignite the fire. Practice the technique regularly to build your skills and ensure you can start a fire quickly when needed.
Ice Lens Fire-Starting
Explanation of the technique
Ice lens fire-starting involves using a clear piece of ice as a makeshift lens to focus sunlight and generate heat. By shaping the ice into a lens-like form and positioning it correctly, you can concentrate the sun’s rays onto a tinder bundle, causing it to ignite.
Difficulty level
This technique can be challenging and requires patience and practice to master. It relies on the availability of clear ice and strong sunlight, which may not always be present in survival situations.
Steps for implementation
Locate a clear piece of ice and shape it into a lens-like form using your hands or a tool. Position the ice lens to focus sunlight onto a tinder bundle, adjusting the angle and distance until the tinder begins to smoke and ignite. Once the tinder is burning, carefully add kindling to build the fire.
Magnifying Glass Fire-Starting
Overview of the technique
A magnifying glass can be used to concentrate sunlight and start a fire. This method harnesses the power of the sun to create an ember, which can then be used to ignite tinder and kindling.
Advantages and limitations
Magnifying glass fire-starting is effective and can make you feel like a wizard. However, it is only viable during the day, preferably when the sun is at its strongest. It also requires a clear magnifying glass and direct sunlight, which may not always be available.
Waterproof Matches
Importance of reliable fire-starting tools
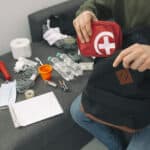
In survival situations, having dependable fire-starting tools is crucial. Waterproof matches are a valuable addition to any emergency kit supplies checklist, as they provide a quick and easy way to start a fire in wet or damp conditions.
Storage tips
Store waterproof matches in a screw-top container to keep them dry and protected. Consider adding a strip of sandpaper to the container to provide a reliable striking surface for the matches.
Advantages over regular matches
Waterproof matches light up quickly and burn longer than normal matches. They are resistant to moisture and can be used in wet conditions, making them a more reliable choice for survival situations.
Conclusion
Advanced fire-starting techniques are essential for survival in challenging conditions. By mastering techniques like flint and steel, ice lens fire-starting, magnifying glass fire-starting, and using waterproof matches, you can increase your chances of starting a fire in any situation.
Remember to consider factors like fire location, moisture avoidance, and wind protection to optimize your fire-starting efforts. With practice and the right tools, you can become a fire-starting wizard and ensure your survival in the most demanding environments.
For a more in-depth look at the basics of fire-starting, check out our guide on understanding how to start a fire.


Leave a Reply